Connect your MCP client
Connect Claude, ChatGPT, Claude Code, Codex, Cursor, VS Code, Devin Desktop (Windsurf), or another remote MCP client to Creator MCP.
Add Creator MCP to the AI app you already use, sign in with your LottieFiles account, and start asking for animations. You only need this server address:
https://creator.mcp.lottiefiles.com/mcpClaude and ChatGPT (no terminal)
Use these steps in your browser or the desktop app. You don't need to install anything. Setup takes about two minutes, and you only do it once. Claude and ChatGPT both support MCP Apps, so you can also preview and refine animations in the chat.
You need a LottieFiles account. Adding your own connector depends on your plan: Claude Free allows one custom connector, and on Claude Team or Enterprise an Owner adds it first. In ChatGPT Business or Enterprise workspaces, an admin must allow creating plugins with MCP servers.
Claude
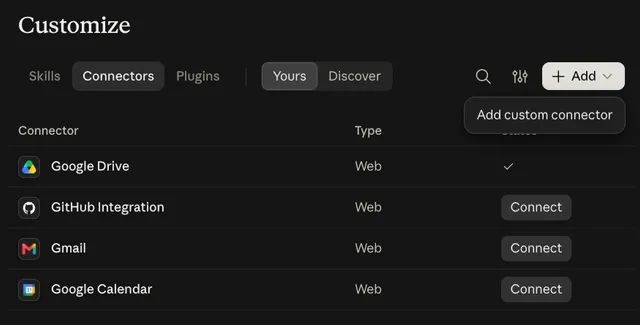
In Claude on the web or in the desktop app, open Customize → Connectors. Select + Add, then Add custom connector.
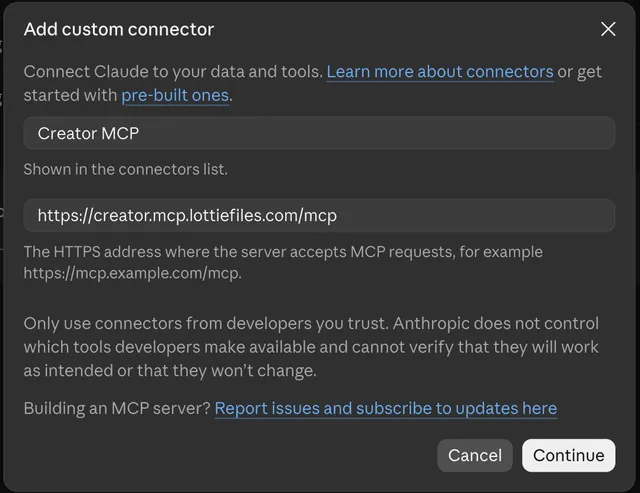
Enter Creator MCP as the name, paste the server address above, and select Continue.
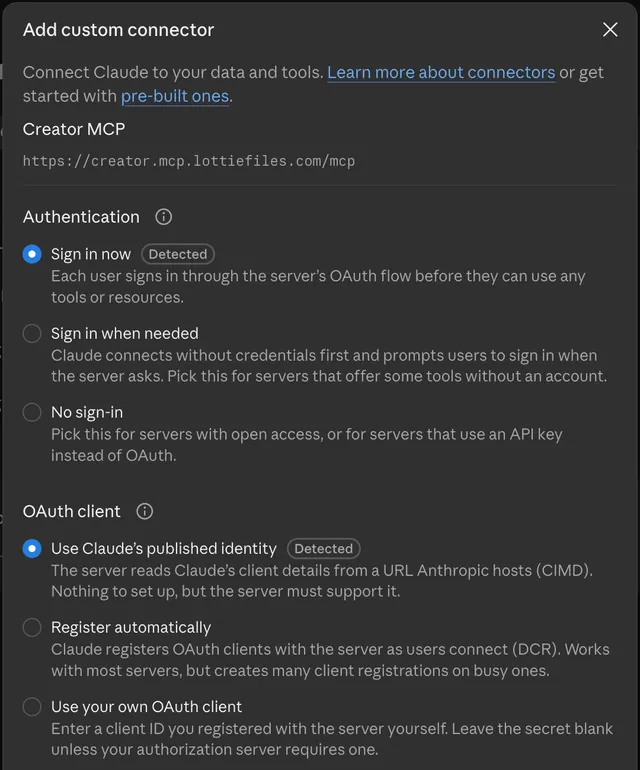
Claude detects how the server signs you in. Keep Sign in now and Use Claude's published identity, then continue and select Add.
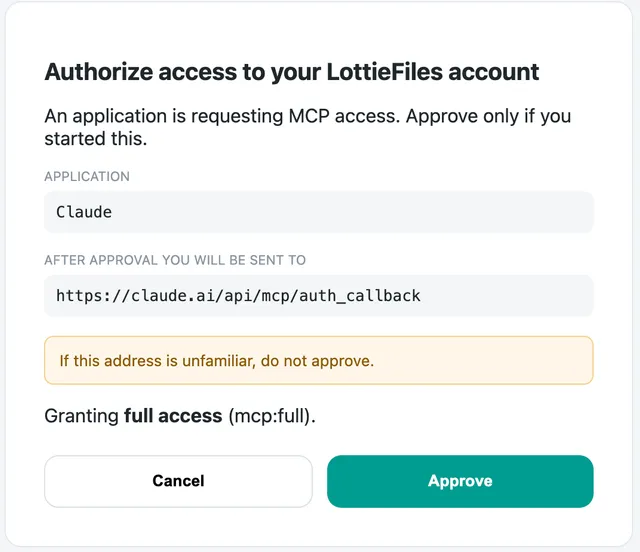
If Claude shows a Connect button, select it first. On the LottieFiles approval page, check that the application is Claude and that you recognize the address shown under After approval you will be sent to. If the address is unfamiliar, don't approve. Select Approve, then sign in to LottieFiles if asked.
In a new chat, select + → Connectors and make sure Creator MCP is on. Then ask for an animation.
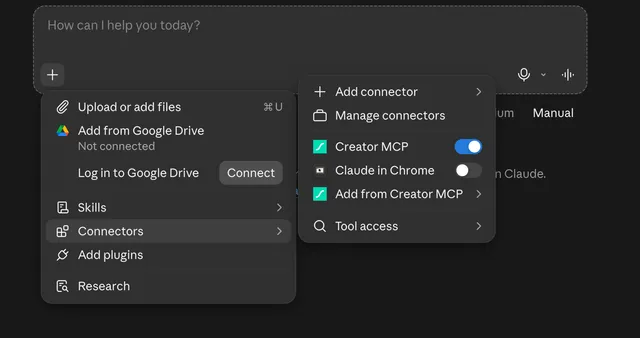
On Team and Enterprise plans, an Owner first adds the connector in Organization settings → Connectors. Members then select Connect in Customize → Connectors. See Claude's custom connector guide.
ChatGPT
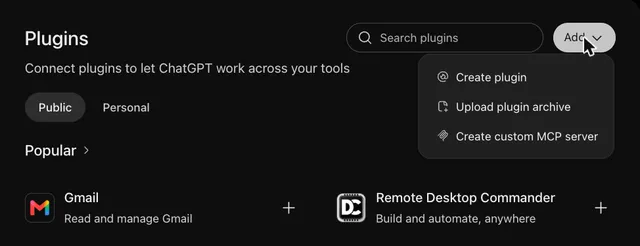
In ChatGPT on the web or in the desktop app, open Plugins in the sidebar. Select Add, then Create custom MCP server.
Enter Creator MCP as the name and paste the server address above. Leave Authentication as OAuth. You don't need to change Advanced OAuth settings.
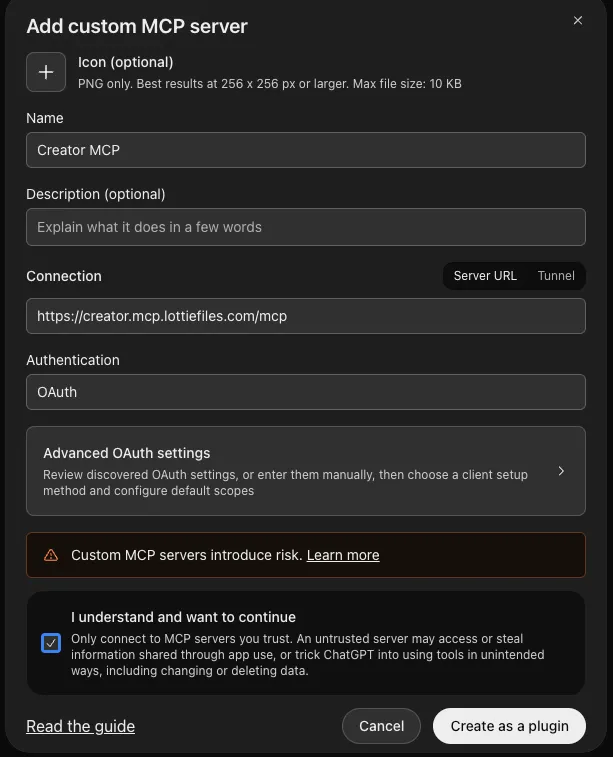
Tick I understand and want to continue, then select Create as a plugin. On smaller screens, scroll down inside the form to reach the button.
Select Connect Creator MCP.
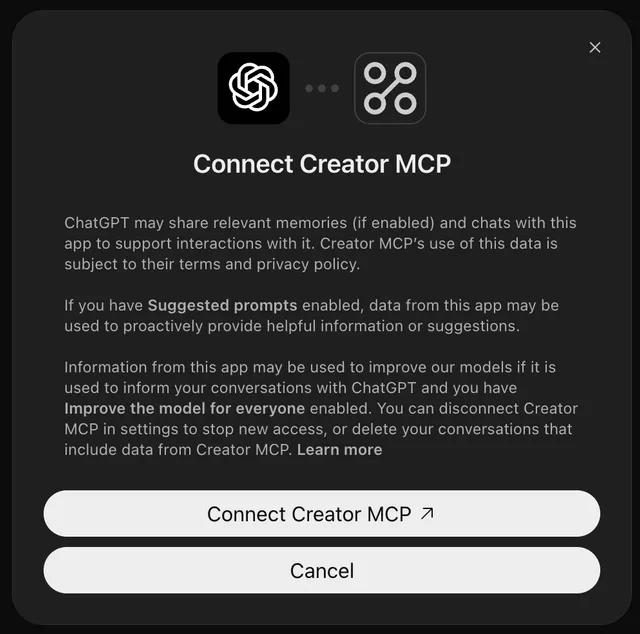
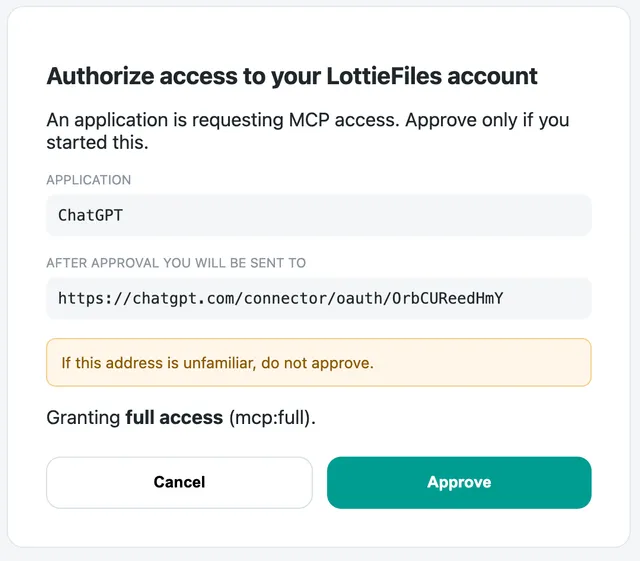
On the LottieFiles approval page, check that the application is ChatGPT and that you recognize the address shown under After approval you will be sent to. If the address is unfamiliar, don't approve. Select Approve, then sign in to LottieFiles if asked.
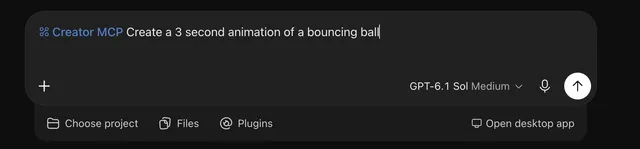
Start a new chat, type @Creator, select Creator MCP from the list, and ask for an animation.
Plugin names must be unique. If you add the server again, delete the old plugin first in Settings → Plugins, or choose another name. See OpenAI's plugin guide.
The LottieFiles approval page expires after five minutes and then shows consent expired. Start the connection again
from the connector or plugin and approve right away.
Developer tools
Use these steps for coding agents, editors, and terminal clients. The server uses Streamable HTTP with OAuth.
Run in your terminal:
claude mcp add --transport http --scope user creator-mcp https://creator.mcp.lottiefiles.com/mcp--scope user makes the server available in every project. Omit it to add the server to the current directory only.
Inside a Claude Code session, run /mcp, select creator-mcp, and complete sign-in in your browser.
Merge entries into an existing configuration rather than replacing other servers.
Check the connection
Ask your agent:
List the tools available from Creator MCP, then read its animation overview.
The server always exposes creator_exec, creator_docs, and creator_document. creator_download_file and creator_delete_file appear when file storage is available, and creator_import_media when the server also has an upload route. creator_account appears with a workspace connection; creator_save_to_workspace, creator_open_in_creator, and creator_load_from_workspace also need file storage. In clients that support MCP Apps, creator_preview adds the preview card, for up to 11 tools. See MCP tools. Use these tool names exactly as shown.
Then make your first animation. If tools or sign-in are missing, see connection troubleshooting.