Your First Animation
Creating your first animation in Lottie Creator is easier than you might expect. In this tutorial, we will walk through building a small bouncing ball animation from scratch using the core tools of the editor. Along the way, you will get familiar with shapes, keyframes, the timeline and preview controls.
By the end, you will know how to:
- •Create shapes on the canvas
- •Animate properties with keyframes
- •Use the timeline to structure motion
- •Preview your animation
- •Export your finished work
Let us get started.
1. Create a New Animation
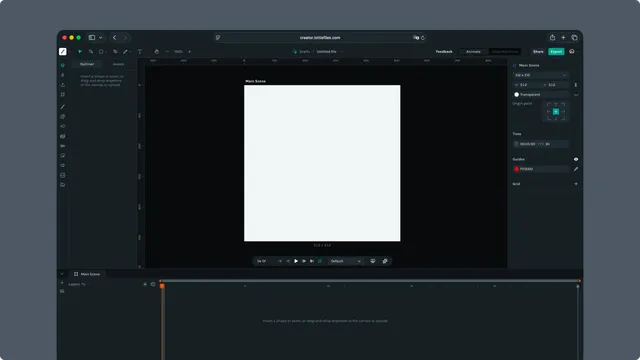
Open https://creator.lottiefiles.com/ in your browser.
A blank project loads automatically. If you are continuing from an existing file, you can also switch files from the Drafts breadcrumb at the top.
The default scene includes:
- •A single Main Scene
- •A default canvas size (for example 512 by 512)
- •A starting timeline with a few seconds of duration
You can adjust canvas size, duration, frame rate and background in the Scene section of the right Properties Panel.
2. Add Your First Shape
We will start with the ball.
Create the circle
Select the Ellipse Tool from the top toolbar
or press Option + O (Mac) / Alt + O (Windows)Click and drag on the canvas to draw a circle
Hold Shift while dragging to keep the proportions perfectly round
Tip
You can always refine the circle size and position in the Properties Panel on the right.
3. Style the Shape
With the circle selected, look at the Properties Panel.
- •Fill: Choose a color from the color picker
- •Stroke: Toggle stroke on or off
- •Size and position: Adjust width, height, X and Y
- •Anchor point: Set the pivot for rotation and scale
If you want a more interesting look, the Fill and Stroke section includes gradient options with draggable on canvas handles.
4. Position the Ball
Let us place the ball near the top of the scene.
Use either of these:
- •Drag the shape with the Selection Tool (V)
- •Or type values in the Properties Panel
For example:
- •Position X: centered
- •Position Y: near the top
You are now ready to animate.
5. Add Your First Keyframe
Select the ball.
Move the playhead in the timeline to frame 0.
In the Properties Panel:
- •Next to Position, click the small keyframe toggle or press P to animate position
A keyframe now appears in the timeline, and the playhead is marked with a small diamond.
This tells Creator to remember the circle’s position at this exact moment.
6. Animate the Downward Motion
Move the playhead to around frame 60 (2 seconds).
Change the Position Y value so the ball sits near the bottom of the canvas.
A second keyframe is created automatically.
7. Complete the Bounce
Move the playhead to frame 120.
Set Position Y back to its original value near the top.
Creator places a third keyframe, completing the up and down cycle.
Your animation now has three important moments:
- •Frame 0: Ball at the top
- •Frame 60: Ball at the bottom
- •Frame 120: Back to the top
8. Preview the Animation
Press Space to play the animation or use the playback bar below the canvas:
- •Play or pause
- •Move frame by frame
- •Jump to start or end
- •Toggle looping
If everything is working, your ball should bounce smoothly.
9. Add Easing for Natural Motion
Linear motion looks stiff. To make the bounce feel more natural, adjust the easing on each keyframe.
How to Adjust Easing
Select any keyframe in the timeline.
In the Right Properties Panel, you will see the Easing section.
Each keyframe has two easing controls:
- •In for how the animation enters the keyframe
- •Out for how it exits the keyframe
Choose Linear or Smooth, or click Edit Easing for custom curves.
Recommended Easing for a Bounce
A natural bounce accelerates downward, hits with impact, then slows as it rises. Apply easing to the three keyframes as follows.
Keyframe 1 — Ball at the Top (start)
The ball should start slow and accelerate downward.
- •Out: Smooth
Keyframe 2 — Ball at the Bottom (impact)
The ball speeds into the ground, then slows as it rebounds.
- •In: Smooth
- •Out: Smooth
This creates the characteristic squash and rebound feeling.
Keyframe 3 — Ball at the Top (end)
The ball slows as it reaches the top of its arc.
- •In: Smooth
If your animation loops, this makes the transition smooth and continuous.
10. Add Squash and Stretch (Optional)
To give your animation more character, you can add squash and stretch at the moment of impact.
Before adjusting the squash, you must set an initial Scale keyframe at frame 0:
Move the playhead to 0s
Activate animation for Scale (press S)
Ensure both Scale X and Scale Y are at 100 percent
This creates your baseline scale keyframe.
Now move the playhead to the frame where the ball hits the ground:
Set Scale Y to around 80 percent (squash)
Set Scale X to around 120 percent (stretch)
When the ball rises again, return Scale X and Y to 100 percent.
This subtle deformation adds personality and makes the bounce feel more dynamic and believable.
11. Adjust Timing (Optional)
You can refine timing in several ways:
- •Drag keyframes closer to speed up
- •Spread keyframes apart to slow down
- •Adjust work area brackets to refine the portion you want to loop or export
- •Change overall duration or FPS in the Scene panel on the right
Creator updates the timeline instantly as you make changes.
12. Save Your File
Creator automatically saves your file as you work. Your file is stored in the current LottieFiles workspace and also appears in Drafts.
You may manually save at any time using the filename dropdown at the top or by pressing Cmd/Ctrl + S.
13. Export Your Animation
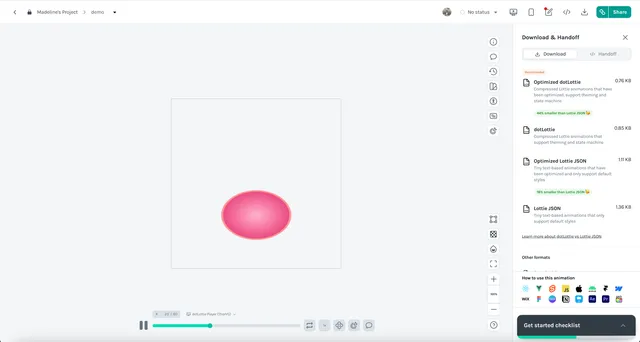
Click Export in the top right. Creator exports your Lottie animation directly to your LottieFiles Workspace.
From your Workspace, you can:
- •
Download the file in your preferred format (Lottie JSON, dotLottie, GIF, MP4, WebM, MOV, TGS, Google Ads)
- •
Embed the animation in websites or apps using the LottieFiles player or generated code snippets
- •Manage your files — organize into projects, share with teammates, or publish to the community
Next Steps
You have created your first animation. Here are ideas to continue exploring Lottie Creator.
Add more shapes
Create small animated sequences with rectangles, polygons, stars and custom paths.
Explore animation techniques
- •Trim Path
- •Masks and Mattes
- •Parenting
- •Nested scenes
- •Motion presets
Try interactive features
Switch to State Machines in the top bar to add events, loops and interactive logic.
Use the ecosystem
Browse animations from the Lottie Library, try plugins or explore AI assisted tools like Motion Copilot.